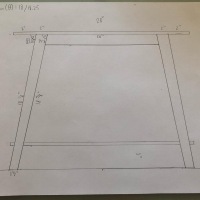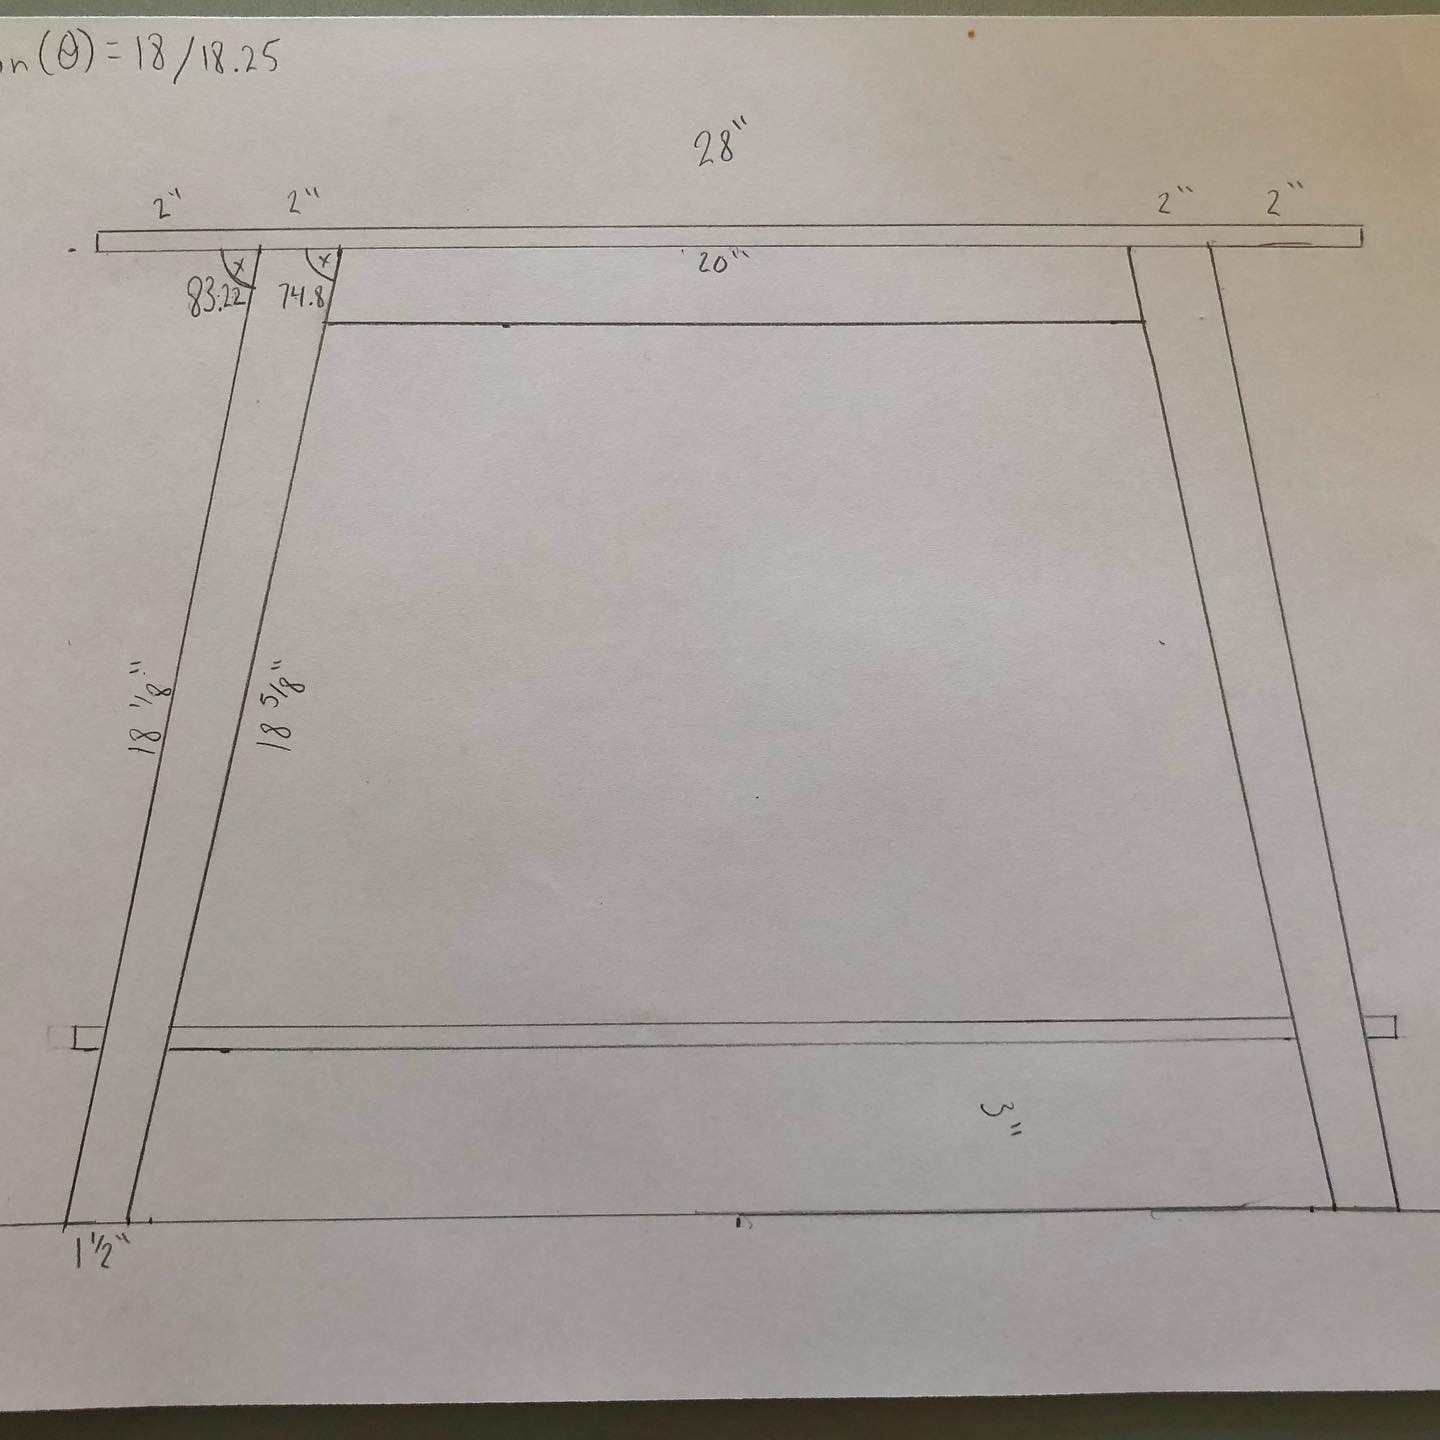
I’ve started my next project; a bench seat with storage shelf. I started out by sketching out the design. It always helps to have a detailed drawing to sort out the dimensions, angles, parts needed. Since this piece has angles, I took this time to do a little trigonometry to figure out the angles I needed to achieve a nice splay to the legs and the appropriate taper.
My original idea was to have typical legs that join with the rails at 90*. However, while I was buying the lumber I found this perfect small offcut of 8/4 (2in thick) that would save me from having to buy a large board to get the legs. Unfortunately, this small piece wasn’t full thickness. That means it was either going to be a thinner leg than planned, or thinner on one side than the other. That got me thinking that I could make that a feature and intentionally make the front face of the leg wider than the side face and I eventually arrived at splaying the legs and tapering them along their entire length. The top of the leg is 2in wide and tapers down to 1.5in at the bottom making the foot an even 1.5in on both sides.
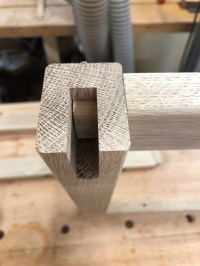
With the design complete, I began with the complex angled joinery. After establishing the desired angles, I milled the lumber square and to thickness, and cut everything to length. The legs received a deep mortise where the front rails connect and a bit shallower mortise where the short rails connect. The tenons were made on the table saw with a dado blade like normal, but this time the miter gauge is angled to match the splay of the legs.
Lastly, I had to make clearance on the inside of the mortise where the tenons intersect. I cut a small notch out of the long stretcher to allow the short one to pass through.
Next up will be the slatted seat and shelf.