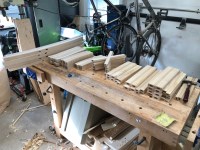
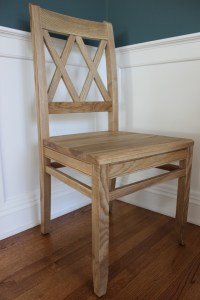
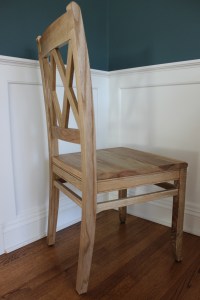
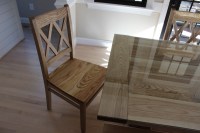
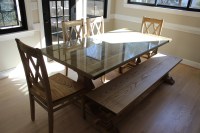
The chairs are complete! I’ve made a few chairs and benches before, but I’ve never made a design that included so many parts and I’ve never made a batch of four before. Although complex, I found the challenge of these to be within my capabilities, but I definitely underestimated the sheer quantity of parts. There are 21 parts to each chair, and most of those have 2 joints each, and the X’s have 4. That’s a lot of joints that all have to come together just right and it was a lot more time consuming than I estimated. What I thought would take 2 weeks, took 3. But, it was worth it. The chairs turned out awesome and the clients are happy to have a completed dining set now.
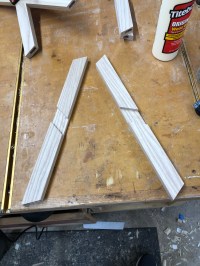
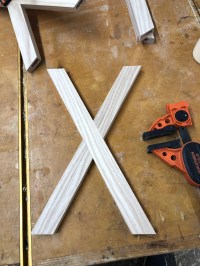
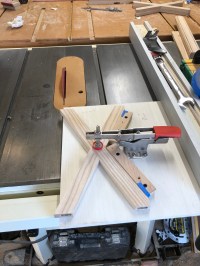
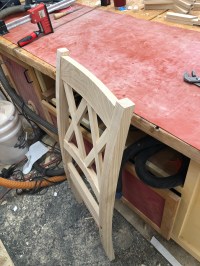
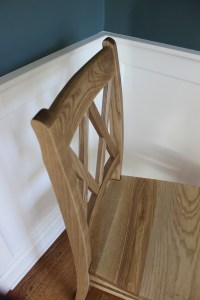
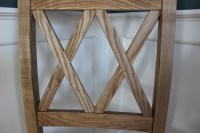
Since I last left off, I completed the joinery for all of the parts. Specifically, the X’s on the back of the chair. These were a bit tricky to get just right as there are a lot of angles at play and the X’s must follow the curve of the back rails. I ended up making a jig that slopes down from the center of the back rails at 4 degrees for the domino joiner to rest on. This allowed me to cut the mortises to follow the curve. However, this also meant the X’s wouldn’t meet in the center or the side of the back rails at 90 degrees either. I made another jig to hold the X’s through the table saw with the blade tilted at 4 degrees. this trimmed off a little on each side so the X’s fit the back frame at the angle of the curve. I could’ve designed it to skip this step, but I didn’t want the sharp points of the mitered X’s to be in the final piece. Trimming a bit meant the X’s would die into one another and the side rail with a flat which I think will be more durable.
With the X’s made and fit into place, I moved on to the finish work. I sanded everything down, rounded over the edges and added a nice bead detail to the seat rails. I also curved the back rails and feathered the crest rail with a unique router bit I found online. Its profile is like a thumbnail edge bit, but its made for vertical routing. This meant the bearing would follow the curve of the crest rail and give me a nice tapered rounder over on the top edge.
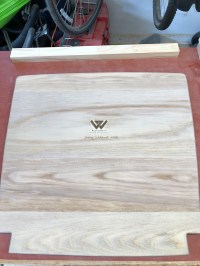
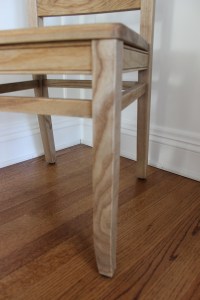
Lastly, I made the seats. After gluing up the panels, I created a template that would fit the seat within the back legs and gently curve around the frame of the seat rails. I finish these up with a small rounder on the sides and back and used a thumbnail edge bit to make a much bigger rounder on the front edge for comfort. After creating and attaching the corner blocks on the inside of the seat frame, I attached the seats through the corner blocks allowing for seasonal wood movement of the seat.
Like the rest of the dining set, this piece was finished with Rubio Monocoat’s Aging #2 treatment and oil plus 2C.
I’m really proud of how these turned out. I definitely don’t claim to be a veteran chairmaker, but I followed the rules of good chairmaking, took my time with the joinery and details and I ended up with a beautiful, comfortable set of chairs. Now, four more at counter height for the island!