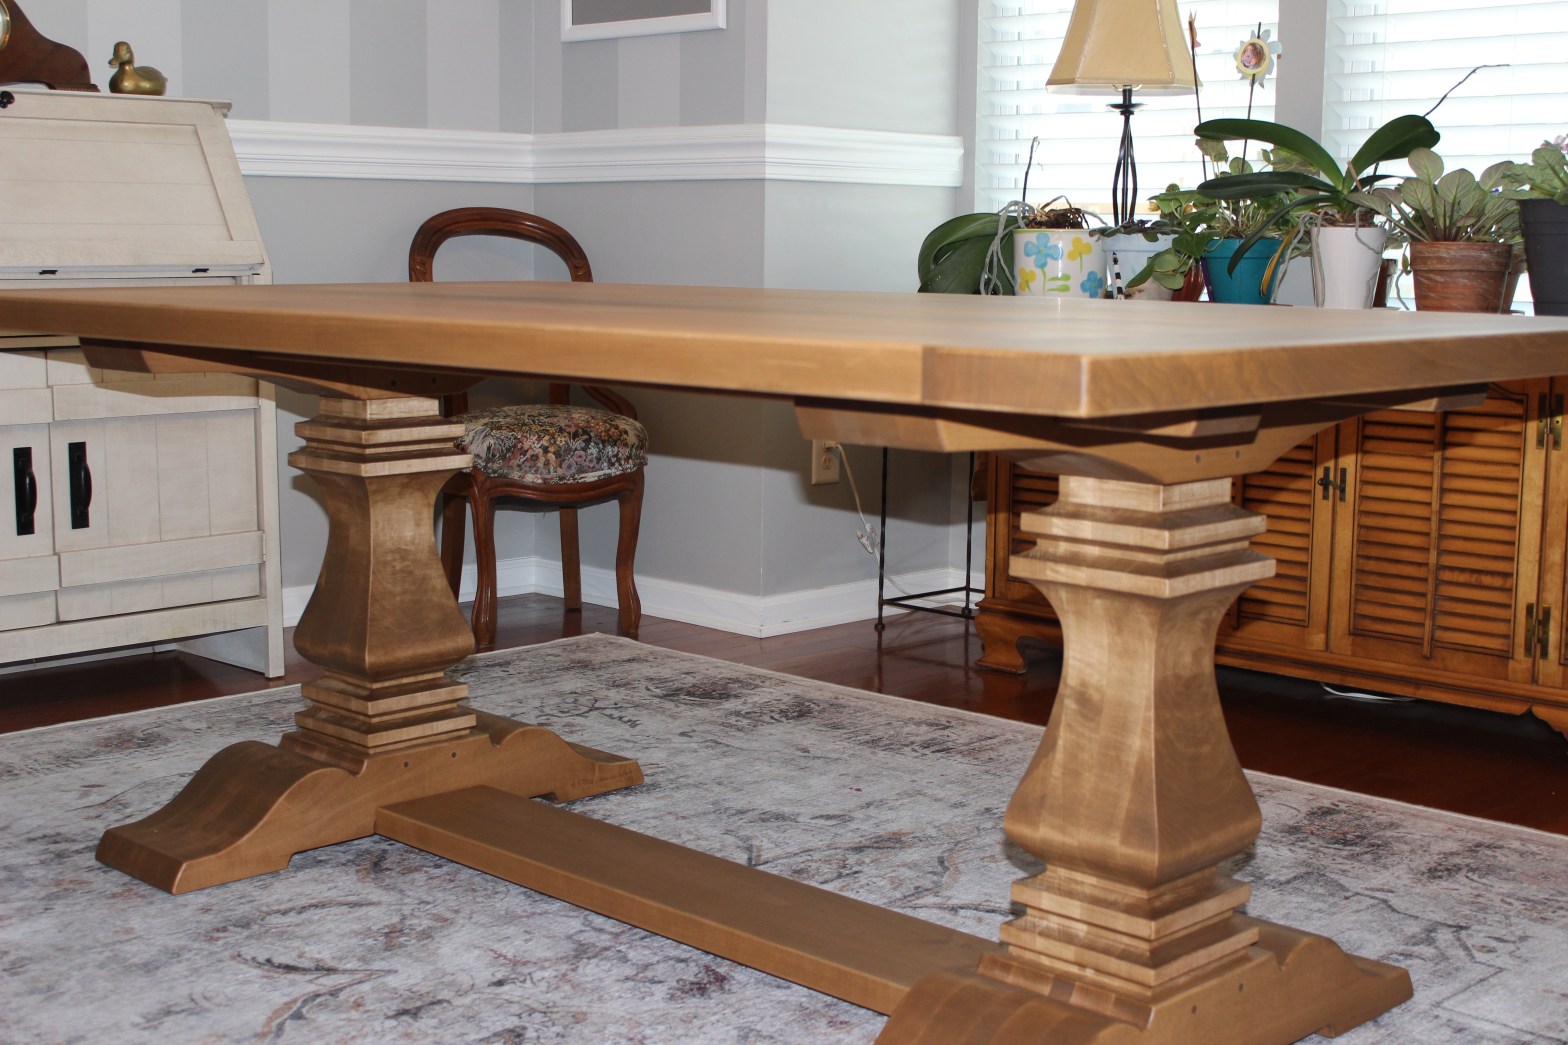
This farmhouse pedestal table is a virtual replica of the one I made at the beginning of the year. This was a good opportunity to take a popular design and improve on it. Overall, I didn’t change much, and what I did change, most people won’t notice, but I focused on the dimensions of some of the parts and joints to make them more efficient to make, and to make the best use of material.
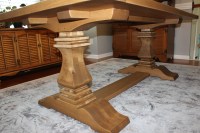
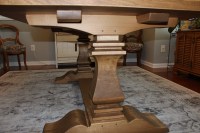
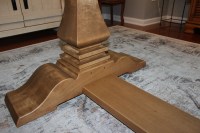
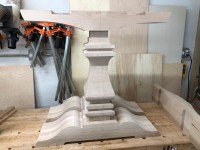
To start I focused on the pedestal base. The first one had an 8″ square column with 10″ wide foot. These dimensions were fairly arbitrary at the time, but on this go around I wanted to use four 8/4 (2″) boards to make the column, instead of five, and leave the foot only slightly wider rather than having it a full 2in wider. I was able to mill the 8/4 stock down to about 1 3/4″ and ended up with a 7″ column. I used the same thickness to laminate the foot and added a 1″ thick board in the middle to make the foot 1″ wider. This gave me a consistent 1/2″ reveal around the mortise of the foot which made for a nicer transition from the foot into the column. I was also able to save about 10 bd ft of lumber for each pedestal which reduced the materials needed and saved a little weight as well. The narrower foot also provides more room for chairs to slide under.
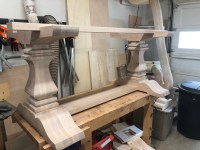
Other than that, this table is basically the same. The pedestal components are laminated 8/4 stock to create the foot, column and arm. These components are joined together with extra large mortise and tenons 1.5″ deep. After joining the parts, I shaped them using a router bit for the small facets and the bandsaw for the sweeping curves. After about a day of sanding, they were ready for glue up. Although it likely wasn’t needed, I also pinned the joints with 4 pegs driven perpendicular to the joint so it can never come apart.
The two pedestals are joined together with 3 stretchers: 2 half lap the arms of the pedestals and one half laps through center of the feet. These joints are secured with knockdown bolts and threaded inserts.
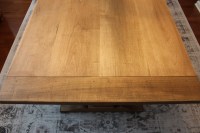
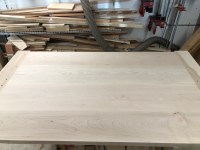
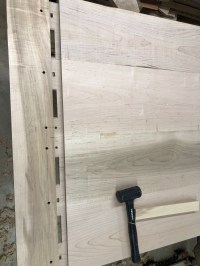
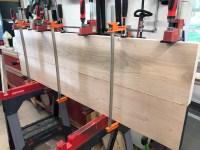
The top is a traditional breadboard top. I chose the widest boards I could find when buying the lumber and I ended up with a 42″ wide top with only four boards! One board was 13.5″ wide which I had to cut down a bit to fit my 12″ jointer and to make the boards a bit more uniform in width. The field of the table is made of simple edge glued boards. Each end received a functional breadboard which will help keep the table flat overtime and allow the field to expand and contract with the seasons. I cut 2.5″ long tenons on the end of the table and corresponding mortises in the breadboard. The center tenon is glued and pinned with drawbored pegs. The other four tenons are left dry and only pinned with the drawbore pegs, but this time, the peg holes are elongated. This allows the table to expand/contract without splitting apart.
I finished the desk with Osmo’s Walnut Wood Wax and Polyx Oil. This is a zero VOC finish that uses natural ingredients to produce a very durable, and easily maintainable finish. The client was hoping to match the color of her existing dining room furniture including some windsor chairs and a buffet cabinet. Although Maple can be finicky to color, this Walnut Wood Wax was a virtual match. She was very pleased with how it all turned out. I can’t ask for much more than that!